In my opinion, the ideal do-it-yourself cooking endeavor should encompass at least three out of four traits: taste better, be more nutritious, save money, or be relatively easy.
Example #1: Rotisserie chicken. (insert loud buzzer sound) Zero out of four. Even with hours in the kitchen, I could never make one as delicious as the $4.99 Costco kind.
Example #2: Ravioli. (repeat angry buzzing sound). Maybe one out of four at most. Do people really make this from scratch? Non-Italians, I mean? If so, props to you. And feel free to drop by any time to "show" us how.
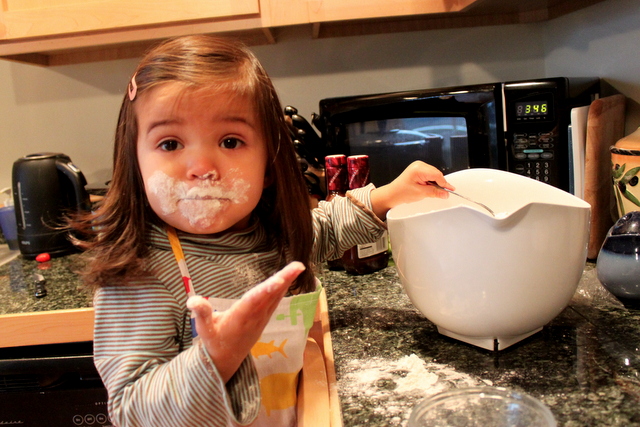
Example #3: Yogurt. (insert happy dinging sound) Four for four! Homemade yogurt is so delicious, healthy, and simple. Really. You might be thinking to yourself, "Make your own yogurt? Next she's going to tell me to milk my own cow." But before you dismiss me as a granola-loving, butter-churning, commune-living pseudo hippie, hear me out.
I first started making yogurt a couple years ago to save some money, as our little household was going through a good half-gallon or more a week, but soon I found that I really did prefer the taste of homemade to store-bought. I was shocked at the amount of sugar, often in the form of high fructose corn syrup, companies managed to pack into those little cups. After reading about yogurt making
here, I went to town. It might sound complicated, but trust me, if you can boil water, you can make yogurt.
------------------------------
Supplies: 3 or 4 glass jars with lids—canning jars are great but any sturdy glass jar will work
a large pot
a dishtowel
a picnic cooler
milk—I’ve had success with 2% and whole, never tried skim or 1% but they might work
1 cup of yogurt starter—basically a plain yogurt with live active cultures. My favorite is Trader Joe’s European style yogurt. I've also had good results with Brown Cow, Tillamook, and Mountain High.
------------------------------
The basic gist:Heat the milk to 185 degrees to sterilize
Cool to 90-110 degrees
Add yogurt starter (i.e. yogurt with live cultures)
Incubate at 90-110 degrees for 4-24 hours
------------------------------
The detailed instructions:Fill the jars with milk, and place them in the pot over a dishtowel, tucking the towel in between the jars a little so they don’t knock together and break. Fill the pot with water.
Bring the water to a boil and allow the milk to reach 185 degrees. If you don’t have a thermometer, you can tell it’s ready when the milk forms a skin on top.

Remove the jars from the heat and set on the counter, skim the skin off the milk, and place the lids on. Place the lid on the pot to keep the water warm. Take the yogurt starter out of the fridge now to let it warm up a little.
Allow the milk to cool on the counter to somewhere between 90-110 degrees (in our house this usually takes about 60-90 minutes). Some sites recommend putting the jars in an ice water bath to cool faster, but I have broken more than one jar this way, and a quart of milk exploding in the kitchen really takes the fun out of this whole endeavor. If you don’t have a thermometer, you can tell the milk is ready when you’re able to hold the jar in your hand without burning yourself, but it still feels pretty warm.
Add the yogurt starter, roughly 2 tablespoons per quart of milk, taking care not to stir too vigorously. Just a couple figure 8s with the spoon will do.

Place the jars and the pot of water (or at least a big jarful) in a picnic cooler surrounded by a towel for 4-24 hours. The goal is to keep it at 90-110 degrees for incubation, though I've never measured. Resist the urge to peek too often; the yogurt sets better if undisturbed, and you don't want your heat to escape. I usually put the yogurt in at bedtime and pull it out in the morning. With a toddler and an infant, I’ll let you guess how long that span of time is. Good thing yogurt is hard to mess up.
That's it! Now you have pure, unadulterated yogurt to devour.
Note: If you are lactose-intolerant like me, you might be happy to learn that many yogurts have low lactose content and are more easily digested than, say, a cup of cow's milk. I am still on the quest for a truly lactose-FREE homemade yogurt product, though. Trial #1 with soy milk was a total fail. One bite and I nearly threw up in the sink. Trial #2 with lactose-free milk yielded a yogurt with a delicious flavor but a texture that was alarmingly like mucus. The quest continues . . .


 5. Go to bed. Pray that the baby will sleep for 3 hours in a row.

 9. Gather the corners of the cloth and secure with a rubber band. Set the colander over a bowl in the fridge, and let the whey drain overnight. Be sure a check the bowl before you go to bed, as it might be overflowing.
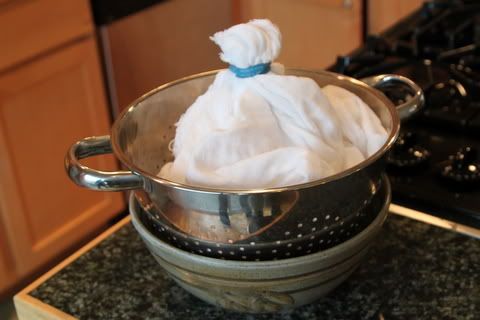
 12. Bring to a party to impress your friends. Or eat it all by yourself during a middle-of-the-night feeding. Really, nobody will know.


